exterior painting service

Interior Painting Trends: Stay Up-To-Date With The Latest Styles

Space might seem completely different by adding a splash of colour, fresh undertones, or a strong, contemporary pattern. When choosing an interior painting colour for any space, just be sure to avoid these common blunders. The newest paint colour trends for 2023 are shown here.

Warm 1990s Neutrals Are Back

Bring on the milk, beige, and brown. The neutral colours we are increasingly selecting for our homes represent our desire to evoke optimism and tranquilly, enveloping spaces in warmth and a feeling of well-being.

Earthy Blues and Deep Blues

Blues are anticipated to be one of the most popular interior painting trends in 2023. Deep blues predominate, although earthy, dusty blues can also be seen in spaces like restrooms or living rooms. Blue is a global “favourite paint colour,” which means that of all Atlanta interior painting colours, blue walls are often the most popular. By 2023, we anticipate that more homes will adopt this colour trend, bringing deep blues into master bedrooms, theatre rooms, living rooms, and other spaces.

Deep blues look best when combined with natural features like big-leafed indoor plants, gold, and natural wood. Dusty blue looks best when combined with natural creams or whites, as well as, of course, natural woods, while lighter woods work better with lighter blues.

Sunny Hues

The goal of Golden Tones is to convey the warmth of summer into your house, from delicate, mild sunshine to zingy lime-tinted yellow. This design may be subtle and delicate or bold and unforgettable when paired with white, black, or other golden colours. You have the option. Happiness is linked to the colours yellow and orange because of how upbeat and optimistic they make one feel. Desaturated colours may make a statement on upholstered furniture, accessories, and artwork in a living room or look great on the walls of a bedroom.

Don’t be afraid to employ vibrant, daring colours in spaces that are frequently used for entertaining; the happy pop of colour will enhance the mood and pleasure of the area. Artwork and mirrors can be used to break up brightly coloured walls to lessen the impact of the colour.

A Soft Pink Colour

In the year 2023, pink is frequently mixed with other hues. It’s a fun accent that goes well with anything from light neutrals to dark blues and may be anything from a subtle blush to a vibrant magenta.

Bold Red

Going bold isn’t always a negative thing, even in a tiny area. However, in the proper setting with sufficient natural light, a bright colour may have a significant impact in a tiny room, providing character and a wow factor that you just can’t create with a safe neutral.

Using The “Fab Five”

For any interior, the timeless and neutral colour scheme of black, white, grey, green, and brown will always be ideal. They connect with the essence of humanity because they are anchored in nature.

Coloured Textures

Okay, so this next choice is more of a texture than a paint color, but it still qualifies in our book. The use of textural treatments has been quite popular recently and is a fantastic method to add patina and aesthetic interest to any space, regardless of how fresh or old it is. These methods, such as lime wash paint or Roman clay, are particularly useful in builder-grade homes because everything being brand-new may make a house appear sterile and lifeless. What’s best? Due to the DIY-friendliness of many of these applications, you may easily create a high-end appearance at home in only one weekend.

White and Blue Navy

This color scheme gives your house a lot of perspectives and gives the interiors a polished, beautiful appearance. This combination is a no-brainer for your kitchen since it also gives the impression that the space is vast and whets your hunger.

Choose A Magnificent Green

The new grey is going green. The era of grey and taupe was austere. The colors emerald, lime, forest, pistachio, jade, and sage are popular right now and can be seen in anything from pillows to headboards to carpets to curtains and linens.

It all depends on what you combine green within your house. Making use of furniture and accessories in soft shades of clay white and chalky grey, while keeping the flooring light and bright, will balance out the scheme’s striking use of greens with a blue basis.

Primary Pairings

Consider decorating your kitchen in a way that is similar to how you would put together an outfit by taking inspiration from color blocking, which is still prevalent in the fashion industry. With two colors—one for the top and another for the bottom—and a dash of color added by accessories like this burst of yellow.

The way affordable painters in Atlanta GA utilize color as much as the colour itself will be the largest overall interior painting trend in 2023. Stronger, simpler hues are often used today. Eclectic music conjures the warmth and harmony of a younger time. This style encapsulates the current trend of adopting a welcoming combination of block colours by enhancing the blue tones with richly saturated green.
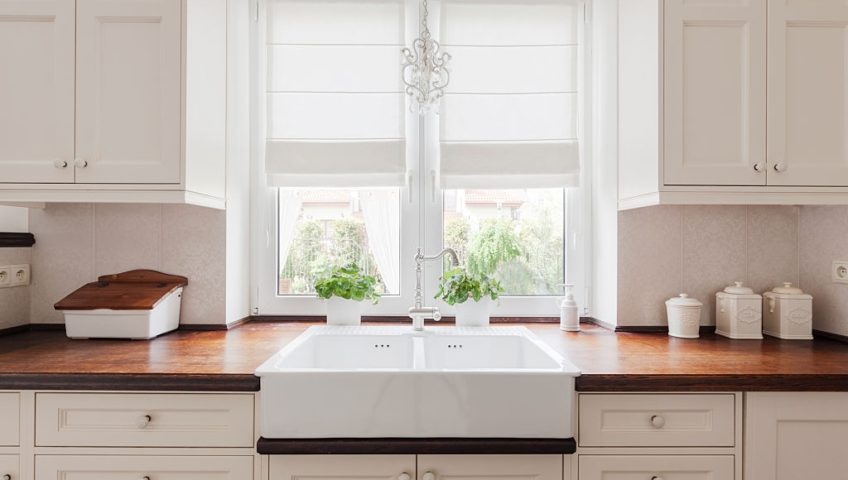
White On White

This year, prominent themes include bright, airy, and clean. Your home will seem tidy and serene if it is all white. Additionally, it may make dimly lit places appear bigger and friendlier. Select the ideal color to create the proper mood if you want to design a space where people may hang out at home. You can get the perfect white regardless of whether you prefer warm or cold undertones because there are so many different colors available. Because it is a little softer than a dazzling white, Simply White is a popular color. Avoid picking a color that appears dingy.

Greige

The lovely shade that makes you think of a foggy sky is back. Greige was first noticed in 2022, adorning walls and cabinets, but it will become more prominent in 2023. It is a colour that resembles chalk and sits in the between grey and beige. When you want to bring the colors of your hardscape inside, this wall colour is ideal. It gives interior areas a delicate depth and warmth.

Best for: Anywhere and in the living room and dining room. Greige is a chameleon because of its complimentary properties. The rise of “greige” will properly muffle color palettes in a way that will have a favorable influence on us not only aesthetically but also emotionally and intellectually. Natural tones are so adaptable and peaceful. If you want to avoid using dark colors, it works great for furniture but can also serve as a modern wood stain.

how much psi to clean concrete

How Much psi to Clean Concrete Driveway?

No one likes a muddy driveway and sometimes, so much dirt has accumulated over the years that you can’t tell whether that shady brown-gray tone was original to the property! Trust us–it’s not!  Your driveway can appear unpleasant due to dirt, filth, and discoloration. Cleaning it can bring it back to its former glory and improve the appearance of your house. Salt, oil, and other chemicals can also have an impact on concrete, weakening the surface. Regular cleanings of these compounds might help your driveway last longer. Pressure washing can save the look of your property and driveway through its high-powered cleaning system. If you haven’t heard of pressure washing or you’re a newbie, don’t worry. We are going to teach you everything you need to know about cleaning a concrete driveway. Read on and then when you’re done, enjoy a smooth parking experience in your refreshed driveway!

What is PSI?

PSI, or “pounds per square inch,” is a measurement of pressure used to gauge a pressure washer’s strength. It quantifies the force per square inch that the water being ejected from the pressure washer’s head exerts. The pressure washer’s power and ability to remove stubborn filth and grit from surfaces increase with increasing PSI. Overall, pressure washers typically have a range of 1000 to 4000 PSI.

Why does PSI matter?

Understanding PSI is crucial for pressure washing since it determines how much pressure a device can produce. Moreover, the cleaning jobs a pressure washer is best suited for and how successfully it will remove dirt, grime, and other materials from surfaces depend on its PSI rating. A greater PSI rating indicates a higher degree of pressure and can result in more effective cleaning, but it can potentially harm some surfaces if not handled correctly. To guarantee both successful washing and protection, it is crucial to comprehend the PSI of a pressure washer and select the appropriate one for the work at hand.

How much PSI to clean concrete?

The volume of filth and dirt that has to be removed, as well as the kind of surface, determine the pressure needed to clean concrete. Cleaning dirt and grime off concrete surfaces usually just requires a pressure washer with a range of 1500–2000 PSI. However, a pressure washer with a greater PSI capacity might be required if the concrete surface is very muddy or contains stubborn stains. Additionally, it’s crucial to bear in mind that a greater PSI doesn’t always equate to a better clean and, if improperly applied, can actually harm concrete. We recommend starting with a lower PSI and adjusting as necessary.

PSI for an electric pressure washer

An electric pressure washer works by pumping water from a faucet and pressurizing it before spraying it through a nozzle to boost the cleaning power of the water. It is a flexible tool for cleaning jobs outside since the pressure may be altered to meet the cleaning requirements of various surfaces and materials. In most cases, a pressure washer with 2000 to 3000 PSI is enough for cleaning concrete. However, some stubborn stains or significant filth accumulation may call for a pressure washer with a greater PSI, such as 4000.

PSI for a gas-powered pressure washer

Unlike electric pressure washers, a gas-powered pressure washer employs a gasoline engine to push high-pressure water via a pipe and nozzle.  Compared to electric pressure washers, gas-powered pressure washers frequently have higher power and a wider operating range. A gas-powered pressure washer must normally have a PSI rating of at least 2,500 to 3,000 in order to effectively clean concrete. To properly clean concrete surfaces, a pressure washer with a sufficient water flow rate (measured in GPM or gallons per minute) is also essential.

Conclusion

Doing pressure washing on your own is great and we believe you’ve become an expert after this but, rather than getting your own machine, why not save yourself the trouble and employ a pressure washing service? A professional pressure washing team can help restore that dulled driveway to look brand new at a cheaper cost and quickly! Whatever you choose to do, we hope you have benefited from our quick tips on PSI and the benefits of cleaning your driveway!

how to pressure wash a fence

How to Pressure Wash a Fence

Fence cleaning is sometimes overlooked, but in actuality, a dirty fence speaks volumes about the overall state of the house and can really reveal years of neglect. As springtime approaches and more community members and local residents will be outside enjoying the gentle breeze, make your fence stand out by learning how to power wash a fence. Fences may harbor years’ worth of filth and germs. If this damage is allowed to build up, it may cost far more to rebuild the entire fence than it would use a straightforward fence cleaning solution. Read along to find out how you can pressure wash your fence with ease to boost your curb appeal this spring.

Preparation

Before you begin the actual power washing process, you should make sure that you have the proper preparation in place for the best results.

Preparation includes the following:

  • Remove any abrasive particles from around and close to the fence.
  • Ensure that your workspace is clear of clutter so that you won’t trip or stumble over anything.
  • Keep doors and openings closed to prevent damage to your home’s inside.
  • Use a sheet to cover surrounding objects such as trees, power outlets, lighting, patio chairs, and any other object.
  • Place your pressure washer in a secure location.

Safety tips for homeowners

There are also some safety tips you should follow before pressure washing. The number one rule is to get acquainted with your tool so that you know how to turn it on and off at the right moment–especially if you’re a first-timer.

Some other safety tips include:

  • When pressure washing, dress appropriately, and always use eye protection to safeguard against eye injuries from particles.
  • Because the detergent includes chemicals that might harm your skin, handle pressure washer detergent cautiously and adhere to assembly instructions.
  • After turning off your pressure washer, squeeze the tip trigger to relieve any leftover pressure before unplugging your nozzle.
  • Always lay the pressure washer on a flat surface.

Scrub, scrub, scrub

There are three types of scrubbing solutions that you can use: your go-to chemical fence cleaning solution, a more natural homemade detergent with vinegar and baking soda, and a mechanical solution using sandpaper.

Chemical solution:

There are many concentrated soaps made for fence pressure washing that come at an affordable price. They are great for clearing out any mold or fungus that may have grown, bird droppings, and any dirt stains.

Natural solution:

You’ll need baking soda and vinegar for this. Baking soda works well as an abrasive substance, while vinegar has a moderately acidic nature. Although this approach will need a little more scrubbing, it is a fantastic substitute for harsh chemicals.

Mechanical solution:

You can also use sandpaper or a sanding machine instead of scrubbing if you have a lot of dirt buildup on your fence. This is also beneficial if you plan on painting your fence afterward.

Pressure Washing Tool Tips

Making sure you are using your pressure washer correctly and using a soft detergent product is important because wood is very delicate. Mistakes can be made quickly because pressure washers work at a high-speed rate. Here are the proper tools you should be using.

Type of pressure washer

A minor project, such as cleaning your car or a tiny picket fence, is best handled with an electric pressure washer. While having a larger power and giving you more freedom to roam around because they don’t need an outlet, gas pressure washers are excellent for cleaning wood fences. Gas pressure washers will be your greatest option because they are portable and light.

PSI (pounds per square inch)

For softer woods you should use a PSI between 500 to 800. If you have stronger wood you can use 1200 to 1500. The average homeowner ends up using around 1800 but even then, they are subtle with their use. Spray the little area on the corner of your fence with various PSI levels to see which one produces the greatest results while preserving the structural integrity of your fence. This will help you determine how much pressure your wood fence can withstand.

Nozzle

The nozzle that you put on your pressure washer also matters. We recommend a 25° tip and nothing less so that your fence gets thoroughly cleaned without any damage that comes with a larger degree tip.

Sweet satisfaction: Pressure washing!

If you are utilizing an average PSI rate of 1800, it will take you between two and three hours to clean a 500-square-foot fence. To prevent damaging the wood, be careful to use a lower psi. The best technique to use a pressure washer to clean a fence is to simply begin at one end and work your way through it section by section. In order to apply the detergent from bottom to top, your pressure washer’s detergent tank has to be switched on. While the detergent has to sit for 5 to 10 minutes, make sure to keep the area moist by applying water.

Planning to stain— pressure wash first!

Homeowners who are performing a deep clean of their fence also have plans to either paint or stain the fence. Mold and fungus-collecting microorganisms are removed by pressure washing. In order to prevent debris or deformations from soaking into the stain, you should always pressure wash your fence before staining.

Conclusion

Now that you have your beautiful picket fence looking shiny and brand new again, make sure that you protect it for the future. Use durable outdoor stains to prevent having to clean the surface once again. Doing so will allow you to only have to touch up the stain every once in a while. But make sure to wait a few days for your fence to dry completely. You may also repair damaged boards if necessary. We hoped this helped!

wood fence cleaning

How To Clean A Wood Fence Without Pressure Washing

When it comes to exterior design, wooden fences are elegant and timeless; they are also affordable and robust because of the amount of wooden fencing. They are not only eco-friendly but also able to increase the value of your home and are simple to repair if they are ever damaged. However, if you live in a cold, humid region, dirt, algae development, and mildew may readily damage wooden fences.

If your fence isn’t protected by a protective stain, chances are you are having trouble with this exact issue. But don’t worry, you can learn how to clean a wood fence using items you probably already have at home without using pressure washing or other high-tech equipment.

Here is a step-by-step guide on the most effective approaches to wood fence cleaning.

Can I clean a wood fence without pressure washing?

It is entirely possible to clean a wood fence without a pressure washer and in fact, more beneficial. Believe it or not, if your pressure washer has a higher PSI it can actually damage and break the wood. Moreover, you would still have to scrub, rinse, and repeat the process if you were to use a pressure washer. Overall, pressure washing fences is a job best left to the experts, which is why we’re here to explain how to clean your wooden fence at home using better and more efficient methods.

Steps To Clean A Wood Fence Without Using A Pressure Washer

Cleaning or Replacement?: Identify the Problem

Take some time to examine your fence more closely before you start cleaning. It might not be able to clean your fence if it is quite old and has severe deterioration such as decay. In fact, any cleaning methods you choose might end up doing more harm than good. If your wood fence has reached the end of its lifespan, nothing would be capable of restoring it. Perform a comprehensive examination before you begin the cleaning procedure.

Wrap Plastic Around The Perimeter Of The Fence

Once you have determined that your fence requires extensive cleaning, you must wrap plastic or a protective sheet around its perimeter, being careful to protect any plants or concrete from potentially damaging chemical cleaners. The same applies to any garden features in your front and backyard when you are cleaning your fence, just as baseboards and flooring need to be covered during an interior paint job. In-home improvement stores like Lowe’s and Home Depot, plastic sheeting is easily accessible. Make sure to cover all greenery up to a meter from the fence, including the grass and plants. Since you’ll be working with items like bleach and preservatives, wear an apron and gloves made for handling chemicals for additional safety.

Start With Water

Since dirt is the main cause of deterioration and is readily removed by a garden hose, often just some plain old water is all that is required to restore the fence’s natural color. You could use a scraper while washing your fence if you are also dealing with buildup.

Use a Small Amount of Soap

You can also use dish soap and warm water to scrub the fence using a soft bristle brush, a soft cloth, or a sponge in order to get into the fine grits of the wood. You’ll need to use a little elbow grease on stubborn stains, but remember to rinse after each scrubbing. To cleanse the wood, we advise using Dawn dish soap or Castile soap. Keep in mind that using dish soap is only practical for a freshen-up and won’t work if you have mold or algae problems. After cleaning the whole fence, make sure it is properly cleaned and soap-free before allowing the fence to dry naturally.

Use Oxygenated Bleach To Clean

For algae buildup or mold stains, household bleach is your best choice. Because bleach is a strong cleaning agent, it should be used carefully to prevent harm to your fence, plants, or any animals that may be lurking in your garden. Many people clean wooden fences with household bleach, but doing so wrong can cause deterioration and staining. Runoff from chlorine bleach can also damage nearby plants, decks, and other structures. To clean a wood fence with bleach, we recommend soaking the affected area with a solution of 2 teaspoons of oxygenated bleach powder diluted in a gallon of water for at least 15-20 minutes before taking a stiff brush and scrubbing away.

Algae Buildup Should Be Removed Using a Scrub Brush and a Natural Mixture

A scrub brush should be used to manually remove any textured algae or moss development in order to eliminate algae buildup since its bristles are tougher and different from those of a standard cleaning brush. To remove the green algae, soak your scrub brush in a mix of water, vinegar, and baking soda. One mild stream of water from the hose will be sufficient to remove the stains once you notice the algae starting to split and become loose. Vinegar is effective in removing mildew because it has a moderately acidic pH. Baking soda helps scrape off the grime because it is an abrasive substance as well.

Sand Tough Stains

If you’ve exhausted all of your chemical cleaning options and there are still some stains embedded in the wood, sanding them off—though a harsh approach—will assist in physically removing the stain-affected top layer of the wood. A sanding tool that may be rented from a hardware store or home improvement store can be used for this. A cheaper option is to buy sandpaper and put in the work. Both are effective and will accomplish the desired result.

Treat With Wood Preservative

After you are done cleaning your wooden fence and it is finally looking fresh and close to brand new, you should treat it with a wood preservative to make sure that algae and mold are not recurring problems. You must allow your fence to completely dry out before staining it, and you should pick a warm, dry day for the task. The ideal tool to use to completely stain a fence is a medium-sized brush. To achieve better coverage, begin painting the fence from top to bottom using short, rapid strokes. The sort of wood your wood fence is composed of will determine whether you need to apply another coat after eight hours.

The dangers of mixing chemicals

You should never mix cleaning chemicals as they can produce toxic gases. If you are going to implement multiple products in one cleaning, the surface needs to be washed thoroughly.

Here is a rough guide on what you shouldn’t mix:

  • Vinegar and bleach produce chlorine gas. Coughing, difficulty breathing, burning, and watery eyes might result from this. Hydrochloric and hypochlorous acids are also produced by combining chlorine gas with water.
  • Chloramine is created when bleach and ammonia are combined. Chest discomfort and breathing difficulties may result from this.
  • Rubbing alcohol and bleach combine to make chloroform. It can damage the eyes, skin, liver, and kidneys, Inhaling or ingesting chloroform might have harmful effects.
  • Vinegar and hydrogen peroxide produce peracetic/peroxyacetic acid. This mixture has the propensity to corrode heavily.

Frequently Asked Questions

Can I spray vinegar on the wood fence?

Yes, you can apply vinegar on a wood fence. However, it is important to note that vinegar is acidic and can potentially damage or discolor the wood if used in large amounts or left on the surface for an extended period of time. It is recommended to dilute the vinegar with water (1:1 ratio) and to test a small area before applying it to the entire fence. Additionally, be sure to protect any plants or landscaping around the fence before applying the vinegar.

What kills green algae on wood?

There are several methods that can be used to kill green algae on wood:
Chlorine bleach: Mix 1 part bleach with 9 parts water and apply it to the wood using a brush or spray bottle.
Oxygen bleach: Mix oxygen bleach (such as OxiClean) with water according to the package instructions and apply it to the wood.
Sodium percarbonate: Mix sodium percarbonate with water according to the package instructions and apply it to the wood.
Copper sulfate: Mix copper sulfate with water according to the package instructions and apply it to the wood.
Zinc sulfate: Mix zinc sulfate with water according to the package instructions and apply it to the wood.

How do I keep my wood fence looking new?

Regularly clean your fence: Use a mild detergent and a pressure washer or a soft bristle brush to scrub away dirt, dust, and debris.
Apply a wood sealant: Use a clear wood sealant or a wood stain to protect your fence from the elements. This will help prevent fading and cracking.
Fix any damaged areas: If you notice any cracks, splits, or holes in your fence, repair them as soon as possible to prevent further damage.

What is the best homemade cleaner for wood?

The best homemade cleaner for wood is a mixture of equal parts water and vinegar. Simply mix these two ingredients together in a spray bottle and use it to clean wood surfaces. This cleaner is effective at removing dirt and grime

How To Get A Smooth Finish When Painting Kitchen Cabinets

How To Get A Smooth Finish When Painting Kitchen Cabinets

Painting kitchen cabinets is a great alternative to investing in new cabinets. It’s a great, affordable way to update your kitchen without the hassle of expensive large-scale kitchen remodeling.
Kitchen cabinets painting is the best way to give them a hassle-free new look. While it can be tempting to hold a brush and paint, there are plenty of other ways to paint kitchen cabinets. Especially when you want to get a smooth finish when painting kitchen cabinets. Here are also some tips and tricks to make the process as smooth as possible.

Top 3 Benefits Of Painting Kitchen Cabinets

There are three main advantages of this choice.

New Look

Kitchen cabinets take up most of the wall space, so it’s one of the first things people notice when they enter the kitchen. If the cabinet is in very good condition and doesn’t need to be replaced, it’s best to ask a professional cabinet painter to paint it back to bring the shine and new look to your kitchen.

Economical

With a team of cabinet painting experts, removing, cleaning, sanding, and painting a cabinet door can be much more economical than replacing the cabinet altogether.

Time-Saving and Convenient

When replacing or upgrading a cabinet, time and convenience are important factors as well as cost. After a while, usually within a week or so, your kitchen can look like new with your chosen paint color.

How To Paint Kitchen Cabinets To Get A Smooth Finish

Before starting this process, these are some steps that require serious effort and time.

Remove the Doors, Drawers, And Shelves

Mark the front and door of each drawer with a marker to avoid messing up the door. Loosen the cabinet hinge screws and remove the door. Remove the hinges from the workbench and reuse them. Shift gears from the strip on the door to the exposed wood under the hinge.

Clean The Surface, Prep The Boxes & Necessary Supplies

Clean the case by spraying with degreasing solution and wiping with a rag. When all parts of the cabinet are clean, rinse thoroughly with water and dry. Smoothness all starts with preparation! If you skip the prep work to paint your kitchen cabinets, you’re setting yourself up for failure. The first step in this whole process is to find the perfect paint color for your cabinets. Before starting, you should gather all the necessary materials. This way you will have everything in one place.

Prime Cabinets, Drawers, And Boxes

Apply a high-quality primer to all cabinet surfaces. The point of using a primer is that the paint adheres well to the surface to ensure the paint’s durability. Allow the primer to dry overnight and repeat the process.

Lightly Sand It and Clean Again

When the primer is completely dry, lightly sand all surfaces using 220 grit sandpaper. Ignore puddles or water droplets. Clean the cabinet again. It is a must if you want to make your kitchen cabinets sleek.

Paint The Cabinets

Paint a new brush for each layer. Pour the paint and body enamel into the paint tray and place the paint on the brush and roller. Use a paintbrush to cut the edges, press the paint into the corners and leave no brushstrokes on the roller. If possible, use a roller to apply the enamel paint to a large, flat surface.

How Much Does It Cost To Paint Kitchen Cabinets?

The cost of painting kitchen cabinets like with all home improvement projects, the price you pay to paint cabinets will depend on several factors, including the size of your kitchen, the materials you paint, and whether you’re doing it.
On the lower tier, you can expect to pay around $900, while at the higher end, the average cost is between $2,100 and $3,764.
Typical prices for cleaning, sanding, and painting kitchen cabinets range from $5 to $10 per square foot. Before painting, removal, sanding, and plastering costs range from $2 to $3 per square foot, depending on the cabinet’s current condition and degree of damage.

Do I Need To Paint or Replace My Kitchen Cabinets?

Repainting kitchen cabinets will be a lot cheaper than having to replace them right away. Paint is an economical alternative for homeowners looking to update the look of their kitchen. Another budget option is to reorganize the cabinets. Cabinets can wear out over the years. If the cabinet shows signs of mildew, or if your door is taking longer to close or open properly, you should consider replacing it.

deck staining and cleaning

How to remove stain from wood deck

If stains on your deck are weathering and peeling off, the first step in updating your deck is to remove all stains. Stains can be absorbed into the wood structure and are difficult to remove. Solid stains will protect your hardwood floors and look great in new conditions, but even the best solid stains will eventually peel and wear out. Most wood has a layer of protective varnish and must be removed.

Always start with the simplest and least corrosive method. If that doesn’t work, move on to something more aggressive. Learn how to remove stains from wood with some professional tips to help you do the job right.

Power Wash

Washing is an important step in restoring the lost charm of the wood. Proper use of a pressure washer will help remove stubborn deck staining & cleaning. However, if used improperly, it can ruin and completely damage your wooden deck. If you’ve ever done deck painting, you know that you need to properly prepare your wood before you start painting. Decking must be thoroughly cleaned to remove accumulated dirt, mold, and mildew.

Before cleaning the deck, it is important to set the pressure correctly and install the spray tip. There are also several deck cleaners on the market to maximize the effectiveness of removing hard stains from decks. You can use a deck cleaner for this. You cannot skip this step. Otherwise, all the dirt will remain under the new stain and the tree will not hold the new layer. The first step to effectively removing stubborn stains is to thoroughly clean your deck.

Deck Stain Removal/Stripper

Even so, cleaning your deck may not be enough. Most decks, especially those with old cracks and stains, require a stain remover. Deck Cleaner softens existing stains, making them easier to remove. Deck cleaners are often combined with sodium hydroxide along with other surfactants to make wood cleaners more aggressive than traditional wood cleaners.

Applying Paint Remover

Paint Remover can be applied with a brush and roller or just like any other stain. Alternatively, you can use a spray bottle with water to apply the stain remover. It is best to leave the product on the tree for 10 to 15 minutes before removing it. This will allow the stripper to seep into the stain and destroy the stain. If you have used hard or semi-hard stains, or if the finish is particularly rough or thick, you may need to apply an additional coat and allow more time to process the remover.

After the deck staining & cleaning gets wet enough, you’ll notice the old stains start to separate from the wood. This is a sign that it is time to rinse the deck again in the washer to remove any remaining stains. If the stubborn stain remains after, you can use sandpaper or sander to remove the stain. When the old stain is completely gone, you can move on to the next step.

Wood Deck Brightener

If your wood deck is still rough and uneven, don’t worry. This is due to the high-pressure washer and stripper. Deck cleaners can help remove stains, but they also give your wood an aged look. All deck cleaners darken the deck to increase the PH. Return the wood to its original color with Deck Brightener.

Most fining agents contain an oxygen-rich formula and oxalic acid. They neutralize the pH and maintain the pH of the wood. Deck Clarifier lowers the pH to reach more acidic levels.

Here Are Some Useful Tips For Applying Wood Bleach

Wash the hardwood floors and remove debris to make sure they are damp and free of all dust particles. Apply wood bleach as soon as possible after a stripper.

Wear gloves and goggles. Always be ready to use as directed. Convenient to apply with the spray pump. Do not use aluminum siding over plants. Wait at least 10 minutes before rinsing. You will see a noticeable color change in the wood. Apply a layer of cleanser to the surface. It opens the pores of the wood and helps to properly apply new wood stains. After applying and covering the entire area, rinse the deck with water.

Always allow decks to dry for at least 48 hours before applying new stains. This is necessary because it will not make the deck smooth and even if we apply new stains to the deck 48 hours before.

Conclusion

Outdoor stains require meticulous care, so it’s important to know how to remove stubborn stains from your deck. Unpredictable weather conditions combined with normal wear and tear can severely damage even the highest quality finishes. With the right use of insulation removers, varnishes, and new stains, your wooden deck can stay beautiful for years to come. These methods are also useful for bug fixing. Even a small spill can fix the mess with a small amount of stripper and bleach. Even a dark brown crust over the light blue paint. With the necessary knowledge and tools, they were able to solve the problem long before the landlord knew it.

pressure wash driveway

How to pressure wash a driveway?

Cement stains, including oil stains, aren’t just an eyesore; they also weaken the surface of your driveway. Stop ignoring those stains and learn how to pressure wash your driveway to keep yourself in ideal shape. Plus, we all know that a clean driveway improves curb appeal.

Do you suffer from unsightly stains on your concrete driveway? Here are some steps that will help pressure clean your driveways effectively.

Sweep the surface and Trap the Plants

Removing debris while pressure washing the driveway is just a waste of time and water. Instead, use a leaf blower to remove small debris such as leaves rocks, stems, and mulch. You can use a broom, but a leaf blower is faster and easier. Do not rush to this step and clarify as much as possible.

Try to cover plants with traps before you start pressure wash driveway. For a cost-effective and lightweight option, use painter’s plastic rollers. Remove the leaves as soon as possible to avoid overheating the plant.

Protect exterior and interior walls & Do safety precautions

Cover exterior walls and doors with plastic sheeting and duct tape. This protects the doors and walls from loose dirt, as well as paint or stains accidentally lost by the pressure washer.

Carefully read the correct steps for your specific pressure washer. Each pressure washer is different and may require special preparation, editing, or attachment. The pressure washer makes noise, water, and other dirt can splash on your face and you walk around in the soft soapy water. Always wear safety glasses, hearing protection, and closed-toe shoes that provide good grip. A powerful pressure washer can cut leather. Use with care and keep it out of the reach of children.

Choose the right nozzle and experiment on a less visible spot

The nozzles are adjusted in degrees and the lower the number, the faster and stronger the flow. Try to adjust the nozzle degree according to your surface when you are doing pressure-wash driveways.

If you hold the nozzle too close, the pressure can affect the concrete surface. The distance depends on the pressure washer’s power and the nozzle you use. Experiment on a less visible spot and see how close you can get without damaging the concrete. If the roof, sidewalls, and retaining walls need to be washed, do this first. Plan and work from the top down. Otherwise, dirty water will run off the surface and ruin your clean driveway.

Use a detergent

Detergent is very effective for cleaning concrete. It removes stubborn grease, paint, and dirt. There are many great options available in the market. Newer pressure washers often include a soap dish for applying detergent.

Rotate the rod back and forth about 8 inches from the surface to create a fine foam. Leave on for 10 minutes and then rinse. Do not pour bleach or other chemicals into the pressure washer’s soap tank.

Treat the stains

Before cleaning the entire surface, remove all oil stains. Try to saturate these spots with diluted concrete cleaning solution from a spray bottle. Ensure a good clean by spraying the concrete with a spray bottle of degreaser, at 15 cm from the surface.

Leave the cleanser on for 10 minutes and Scrub the degreaser into the concrete with a stiff brush or pressure washer. Then rinse it off in a pressure washer. Some stains are difficult to remove, paint stains clean them quickly, but grease and rust stains take longer. If the stain doesn’t go away, treat it a few more times with a more dilute solution.

Start at the top and work on small sections

Start at the top and work your way down. You don’t want dirty water flowing where you just cleaned. Also, be sure to park the pressure washer near the highest point so that it drags the pipe behind you, rather than pushing it constantly.

If you spray the entire surface with soap at once, the soap will settle and dry before you can wash it, which can leave marks. Try to divide the whole surface into smaller sections and then clean it.

Seal the Concrete

Pour the waterproof sealant into the paint pan, add the roller cover to the roller handle, connect the extension rod. Next, starting from the center of the area, apply a waterproof sealant from the center to the entire edge of the concrete. Wait 24 hours before parking on the surface.

Deck Cleaning and Staining Service

How To Clean Deck And Prep It For Staining?

Cleaning a deck for staining is a detailed procedure that requires skill and experience both and in case you lack in something, then you should stay away from doing it yourself. Like every process, the deck cleaning also starts from gathering tools and materials and a good list of tools can be found online. Generally, a good toolkit includes brushes, cleaner, sandpaper, water hose, etc. If something is missing from your toolkit, then it is better either you buy it or borrow it from a friend. In case of any kind of difficulty, you can easily hire a lock deck cleaning and staining service. You can also use the following tips to get your deck perfectly cleaned up.

Sweep the deck thoroughly

Before you rush for staining, it is important to clean the deck perfectly to achieve optimal results. Otherwise even after staining the quality of shine would not be as you expect. So, take a soft brush and clean all the debris and leaves from the deck. In case it’s a messy deck you might have to repeat the process multiple times to ensure a hundred percent cleaning. It doesn’t take much time but as any good deck cleaning service suggests make sure you choose a dry day for it because doing it in windy condition would double your effort.

Apply the cleaner

Once you are ready with the cleaned deck now it is time to apply the deck cleaning agent to remove the dust and debris from the grooves. For that purpose, you are going to need a very good commercially available cleaning agent. Either get a recommendation from an expert or just read the description before the selection of the cleaning agent. You can use a sprayer to make it evenly spread on the surface and don’t forget to wear protection for your eyes and face. If you have a bigger deck, the experts at the deck staining service recommend dividing the work area into smaller sections. 

Use a hard brush for perfect cleaning

After you are done spraying the cleaner on the deck wait for about fifteen minutes or the recommended time on the instructions before you start cleaning the surface. When you are done waiting it is time to use a hard brush to scratch out the debris and dust stuck in the porous surface. As you’ll go ahead you’ll see a clear difference between the clean and the dirty surface. Given the level of dirtiness, you might want to go a second or even a third round. In case you have a greasy surface, you must use a grease remover before you start the cleaning process. 

Wash out the cleaner properly

When you have done with the basic cleaning procedure it is time to see the results of your hard work. Just pick up the commonly available water hose and choose an appropriate nozzle to create pressure and wash off the cleaner and the dirt from the deck. You may have to go several rounds to get it off completely. If you are still not satisfied or notice the presence of cleaner when you touch it, then using a cleaning brush can help you do that. Because the cleaner is dried in the wood, it would be prominent and can affect the staining quality.  

Final touch with the sandpaper

Now that you have washed off all the dirt from the deck and it is dried up it is time to tune it up for the staining. The easiest way to do that is to use sandpaper. Make sure you choose the right sandpaper based on the type of wood your deck has and try to do it as gently as possible. Because even if the sandpaper is used for perfection you don’t want to create an imbalance by rubbing it too hard. Don’t forget to clean off the dust to see the results. Once you are satisfied clean the deck again and let it dry completely before you start the staining process. 

The cleaning of the deck for staining isn’t a simple process. In fact, it is a process that demands a perfect combination of skills and effort. Anything out of place would just ruin the deck for good. That’s why if you are not up for the challenge it is recommended to hire a professional that has years of experience. The experts are a lot faster and the final result is a lot better as compared to a personal effort. They can cover a lot more ground in a short amount of time. So, don’t be hesitant to hire an expert if needed. You just have to be sure that the company you are hiring for the task is reliable. Most of the time the help hired through references is the solution to everything.


Pressure Washing Services

Best Practices You Should Follow For Doing Pressure Washing

The pressure washing services that include the use of special vehicles, tools, equipment, are indeed very appealing to watch. However, the role it plays in the maintenance of buildings is crucial. 

House pressure washing or commercial pressure washing can greatly improve the health of our surroundings by implementing environmentally safe procedures. All you need to do is be careful about the water that you use during the process. 

Harmful chemicals and substances can seep into the drains and other water bodies that then negatively impact the ecosystem around. This also takes a toll on the quality of the water used for drinking and residential use. 

Hence, it is imperative that you have a proper safety plan of action to eliminate dirt, oil, and other grease that you remove from the surfaces. To achieve this, you must adopt certain safety practices following strict instructions while power washing. 

At the same time, such practices will allow you to maintain a proper schedule for your pressure washing services and keep you away from expensive cleanups later on. Here are some of our top safety recommendations for pressure washing. 

1- Figure out where the used water gets drained 

The best practice during pressure washing is to figure out the exact pathway the used water and the dissolved contaminants take. Here are some of the places that this water can get drained: 

  • If the soil is permeable on the ground, it will seep there. 
  • This water can also go into a storm drain. This carries untreated water into a larger water body such as a lake or a stream. 
  • Inside a sewer system where the water will undergo treatment before finally discharging.
  • Inside a drain that then drains water into a retention water body such as a pond or a basin.

2- Go for low temperatures 

Remember that not every cleaning procedure needs hot steam treatment or pressure washing with high temperatures. 

The ideal practice is to use water with moderate temperatures. It gives the same result as high-temperature water but using fewer resources and providing enhanced safety for the cleaner at the same time.  

Keep in mind that multiple municipalities do not allow discharging the high-temperature water as it can create an imbalance in the water bodies and kill aquatic life. Stick to the standard practices. 

3- Do your homework on cleaning liquids and equipment

Whenever you use any cleaning liquid or detergent, keep an eye out for labels like “biodegradable”. This may give the illusion that the product can be safely used, however, being biodegradable does not mean “no threat or harm.” 

If you do some research you will find out that biodegradable simply means that the product is safe for the bacteria and microbe life in the water body and will break down into its components faster than other products without affecting the aquatic life. 

You will also commonly find the use of the term “non-toxic” on many cleaning liquid bottles, however, this term is quite misleading. Even if your product is non-toxic it can severely harm the water bodies. 

Many municipal authorities will collect samples of the cleaning liquid and detergent to verify their safety in terms of being “biodegradable” or “non-toxic.”

4- Prior to spraying, do not skip sweeping 

Get into the habit of removing the surface contamination before implementing the pressure washing treatment. Wipe off any apparent dirt and loose particles on the surface. Make sure you properly pat dry the liquids and dispose of them in a disposal bag. 

When you stick to the prescribed pressure washing practices, you will get desired results while protecting the environment.

Cabinets Painting and Refinishing

Important Reasons Why You Should Invest For Cabinets Painting And Refinishing

You need a kitchen that you can truly desire. This is why you should consider cabinets painting and refinishing. If you can’t wait for a change and do not want to break banks for a complete kitchen remodel, your best bet is kitchen cabinet painting. But why are you renovating your cabinets? It’s simple: make them look their best once again. So you can expect to take advantage of this benefit right away when you choose to do this job. However, looks are not the only perk you will enjoy when getting cabinets refinishing for your kitchen, nor necessarily the best. After all, there are so many benefits that you will enjoy getting a professional kitchen cabinet finish, and you will be able to enjoy those benefits for many years to come. So, what are these advantages?  If you want to find out, start reading.

For A New And Better Look

The difference that a single coat of paint can make for your kitchen cabinets is simply astounding. The new coat of paint can literally transform your kitchen space as a whole, helping to modernize the look of your old kitchen or create a classic look for your modern space if that’s more your speed. A fresh coat of paint on your kitchen cabinets can not only bring out the colors in your kitchen as a whole but can also complement your kitchen counters.

Improve The Value Of Your Home

It is a fact that kitchens are sold at home and shoddy kitchens are not. Painting your cabinets can improve the value of your home, in fact, it has a great return on your investment and will help your home sell faster. On the contrary, old, dirty, and dark cabinets will keep your home on the market longer. Potential buyers will be aware that they need a kitchen to remodel, and most buyers these days know that it can add up to a fortune. 

Longer Life Of The Cabinet

Your cabinets are an important fixture in your kitchen, and truly high-quality cabinetry will waste a bit of your time. However, the investment will pay off when you can enjoy impressive and durable cabinetry and the beauty of high-quality cabinetry. Because quality cabinets are so cheap and expensive, you will want to enjoy yours for many years to come. To do this, you need to invest in refurbishing the cabinets when they start to wear out. By repainting, you can add many years of use to your cabinets, a benefit that will save you money over the years.

It’s Cheaper

While many homeowners choose to replace their old cabinets when the old ones start to look bad due to wear and tear, this option is not always the cheapest. If you are working on a tight budget, cabinet replacement may not be a viable option for you, but painting your kitchen cabinets is a much more affordable option and produce amazing results for your kitchen space. Cabinets are the most expensive item in the kitchen, so if you can avoid buying new ones, you’ll save a lot of change. 

Less Inconvenience

At a minimum, it is 6 weeks, but more often it is eleven to twelve weeks and sometimes a lot longer because something inevitably goes wrong or causes a delay. It means a long time without a kitchen and it’s no fun as it feels like your house is in a mess and all of your stuff is in other rooms.

Health Benefits

Kitchen cabinets will take more spills and clutter than any other cabinet in your home. After all, they’ll always be near your stove and sink. This means that your cabinets are sure to be covered in food particles and exposed to moisture at most times of the day. Over time, the build-up of food and moisture can lead to the growth of mold and harmful bacteria in your cupboards, where you store your food. If your cabinets have been exposed to this exhibition, you should look for a finish, which will fix the problem immediately.